Install Openvpn in Ubuntu
Rahmat Subandi / 02 January, 2023
5 min read • ––– views •

Introduction
Hi, on this occasion I will discuss how to make your own VPN, with the help of OpenVPN.
What is VPN?
A VPN or Virtual Individual Network (Virtual Private Network) creates a private network connection between features via the internet. VPNs are used to transmit information conveniently and anonymously over public networks. VPN works by hiding the user's IP address and encrypting information so that it cannot be read by anyone who is not authorized to receive it. [1]
What is OpenVPN?
OpenVPN is a virtual private network system that implements methods for creating convenient point-to-point or site-to-site connections in routed or bridged configurations and remote access facilities. It implements client as well as server applications. [2]
OpenVPN is an open source technology that they developed in 2002 by a programmer named James Yonan. The OpenVPN protocol subsequently evolved to toughen web to web and point to the primary connection for business users connecting to industrial networks from remote locations. OpenVPN is designed with a “custom” information security protocol that uses cryptography/TLS/SSL encryption to secure online communications and data transfers. [3]
Prerequisite
To follow this article make sure you already have a VPS with the Ubuntu operating system. In the article I'm using Ubuntu version 20.40
Connect to VPS
To connect to a server that you already have is very simple. You can use the terminal/comand prompt on your computer or you can use PuTTY if you have it, but I will give an example using the built-in terminal only. For the steps, please follow the steps below:
- Open teriminal
ssh root@IP_ADDRESS

# NOTE: you can replace root with the user you have, but you don't need to change it, because root is the highest access right in the scope of ubuntu. And IP_ADDRESS replace with your server IP
- If you log into the server for the first time, there will be a warning like this:

Just type yes and press enter
- Then enter the server password that you have created.
(Note: If you are new you will be confused why nothing appears when typing the password, just continue by typing the correct password, because ubuntu is like that)
- And done, you are connected to your server.
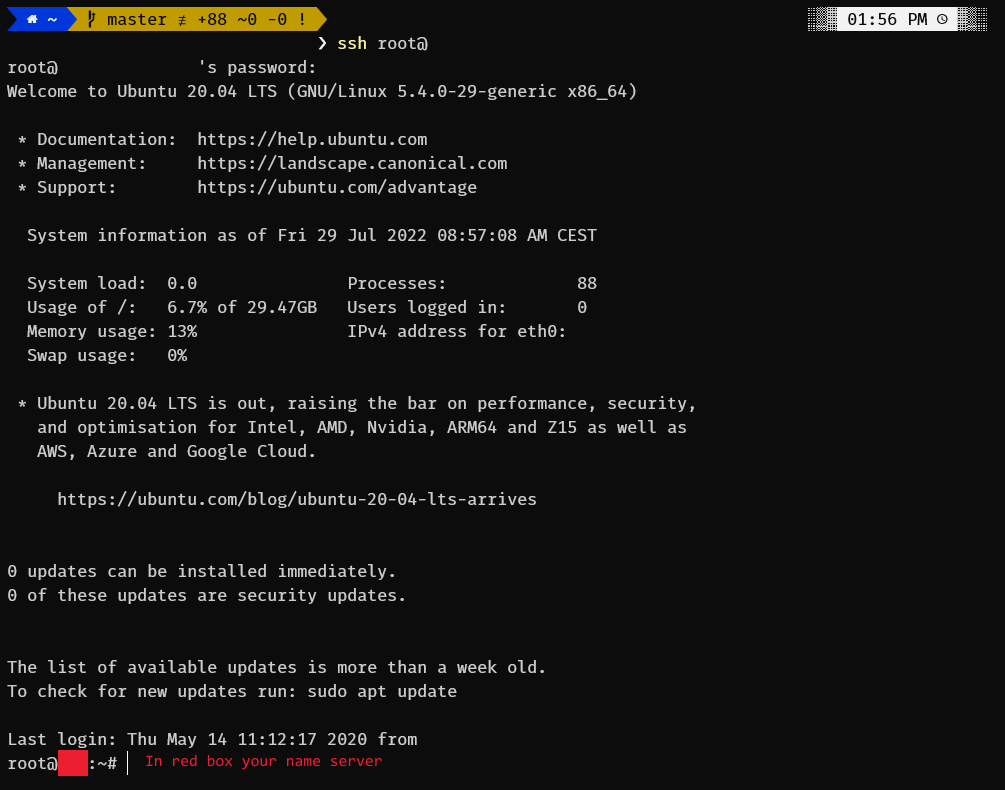
Install OpenVPN
- Please follow the step-by-step below:
wget -qO - https://as-repository.openvpn.net/as-repo-public.gpg | apt-key add -
echo "deb http://as-repository.openvpn.net/as/debian focal main">/etc/apt/sources.list.d/openvpn-as-repo.list
apt update
- Then type the command below to install the OpenVPN access server:
apt install openvpn-as
- When successful you will see something like the image below:
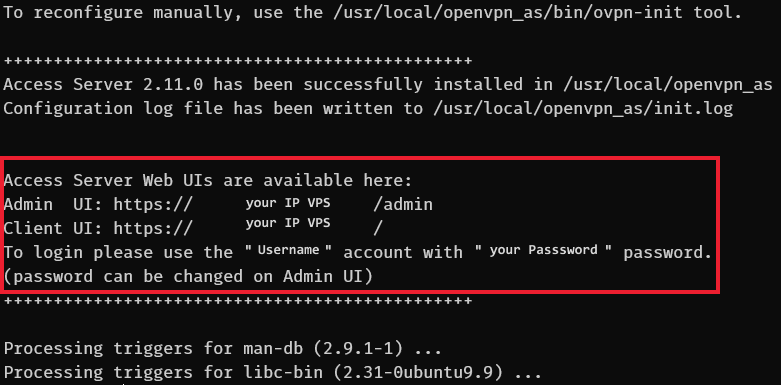
Focus on the red box, it contains the URL, Username, and Password for you to use to login.
Finally the installation is complete, let's move on to the next stage to try the VPN that we have made
Hello, OpenVPN!
Let's try to access the url we have got
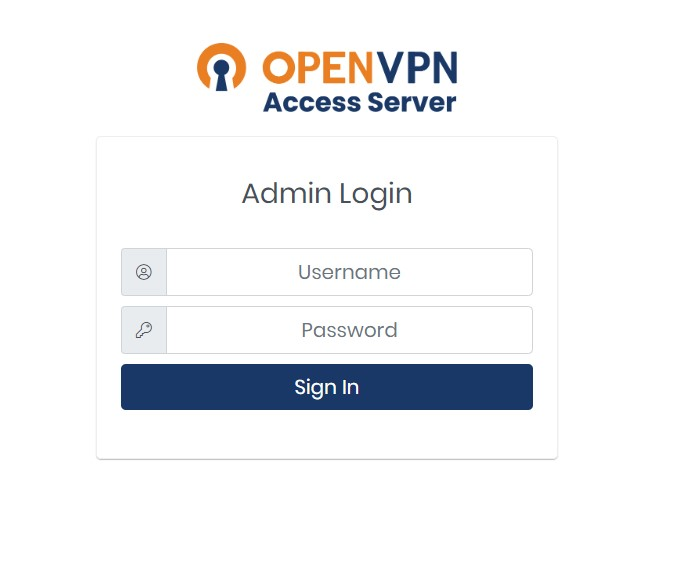 Enter the username and password that we got when the installation process was complete.
After successfully logging in for the first time OpenVPN will display an agreement that we can read (if you want😜) just click the Agree button.
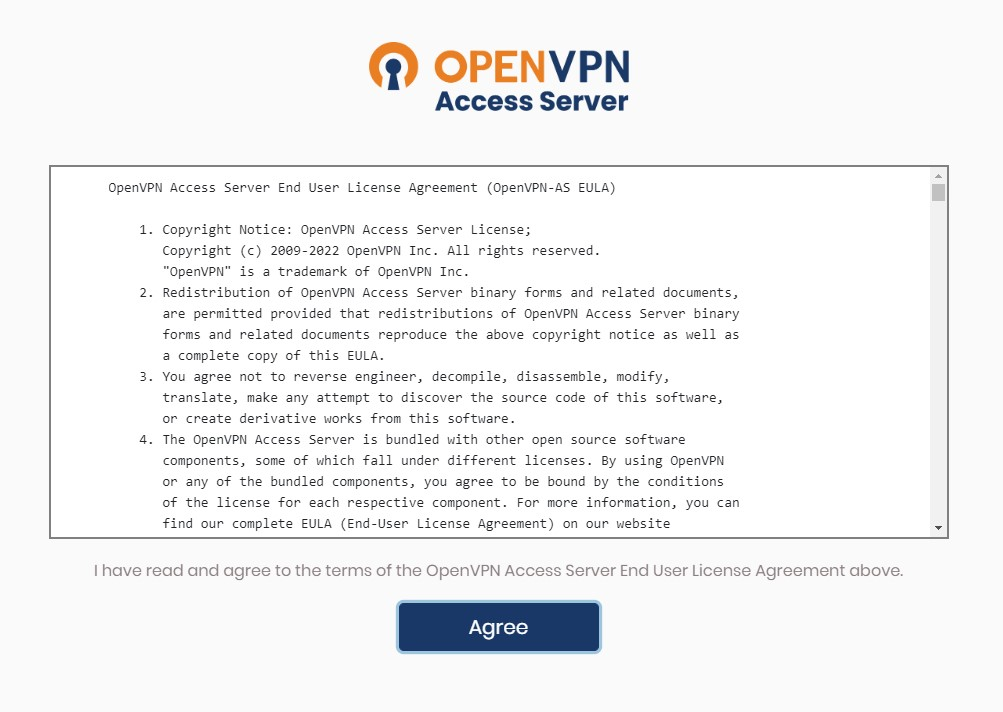
And, here weee gooo🔥🔥🔥
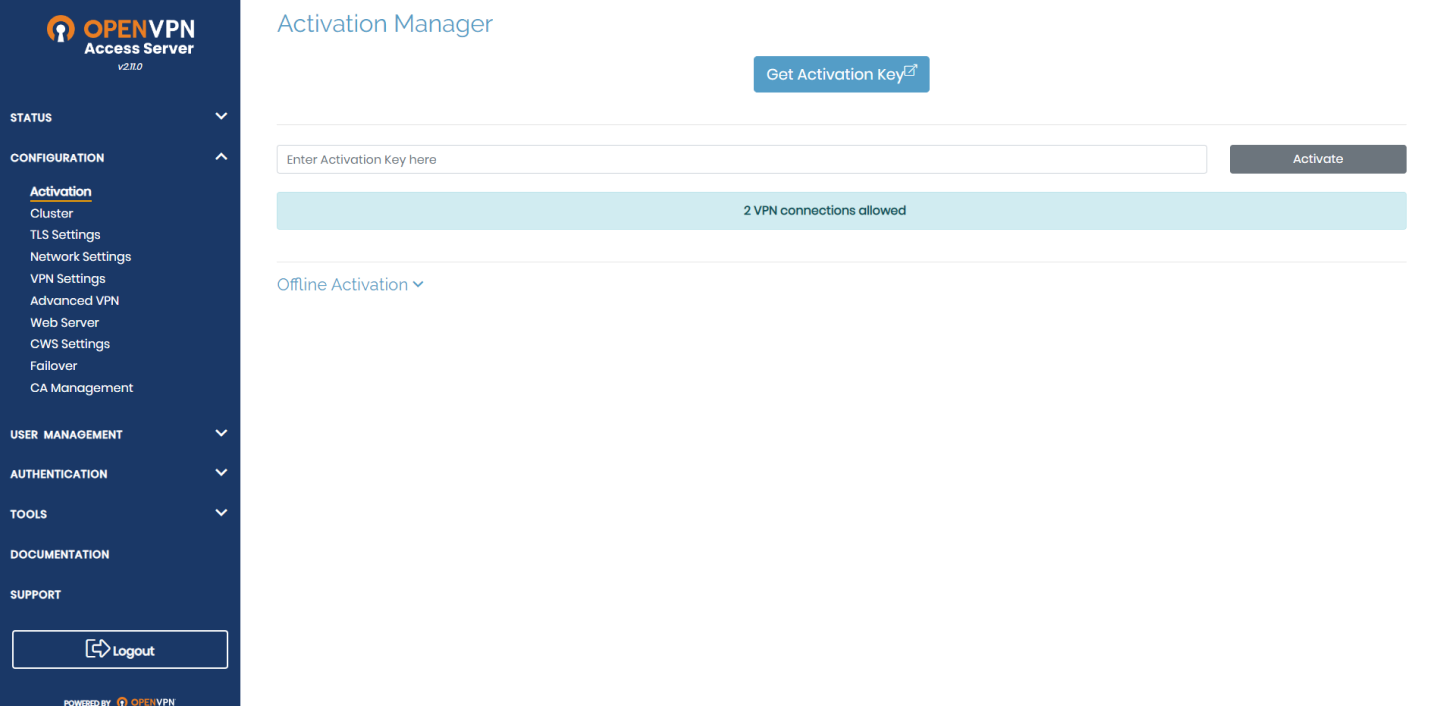
Setup basic (If you want)
- In submenu
CONFIGURATION, click VPN Settings. Scroll down to the Routing section, and select No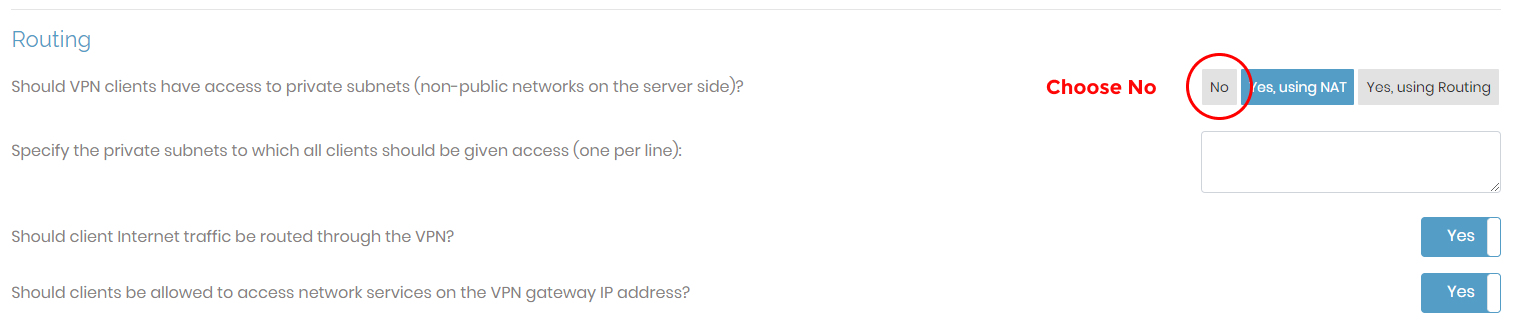
- (OPTIONAL) Still on the same page, scroll down a bit, in the
DNS Settingssection, Select Yes toHave clients use specific DNS servers. And insert1.1.1.1for Primary DNS Server,1.0.0.1for Secondary DNS Server.
- Click Save Settings, after that at the top there will be an alert, click Update Running Server again.

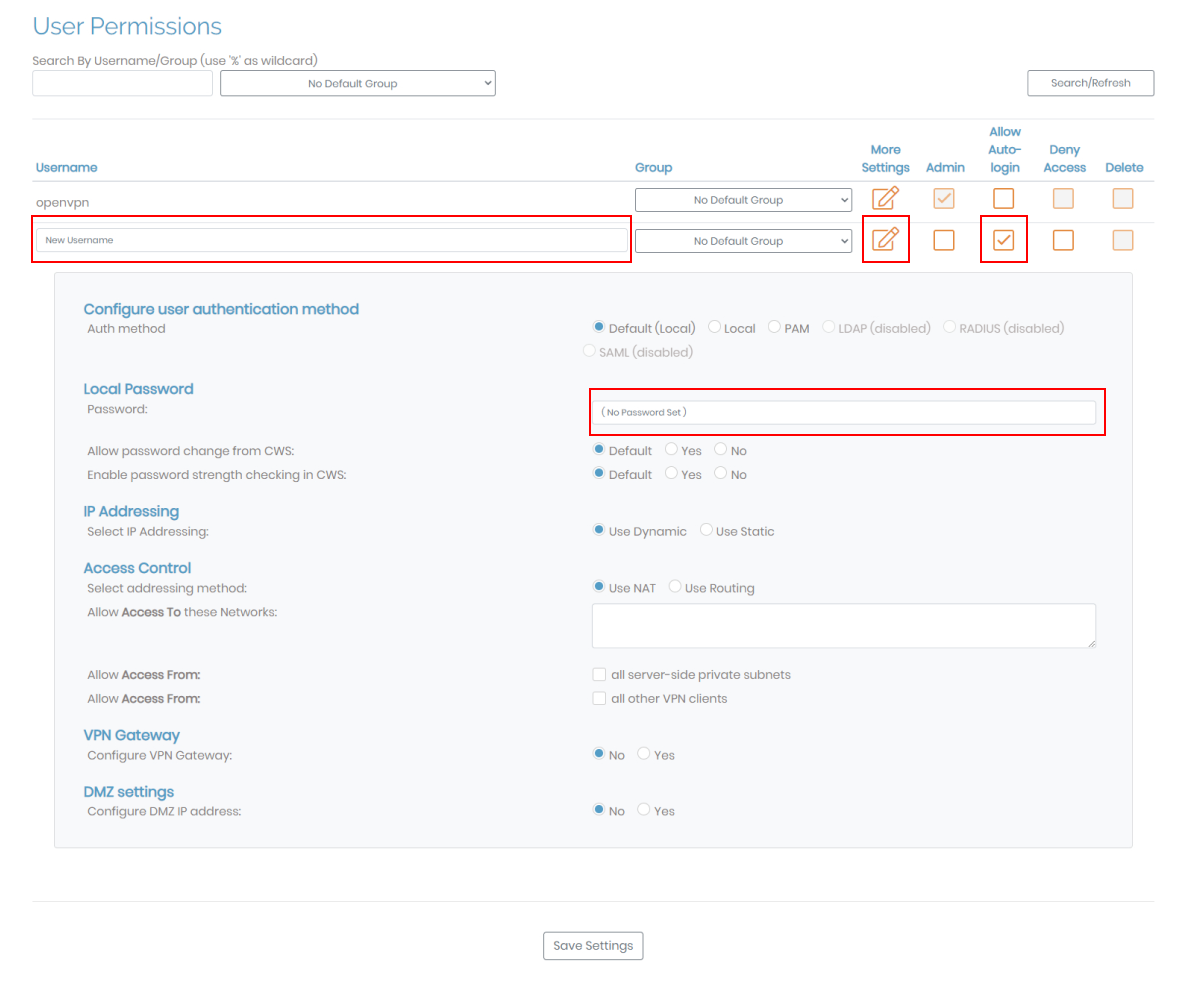
Create User
- In the sidebar of the
USER MANAGEMENTsection, clickUser Permissions. - Type in the username, check the Allow Auto-login section, so that every user who wants to use a VPN must enter a username and password first.
- Then click More Settings with the Pencil icon, enter the password for the user, the rest doesn't need to be in settings anymore, but if you want, you can do it.
- Click Save Settings, after that at the top there will be an alert, click Update Running Server again.
Let's try it
The final step of this article, let's try the VPN that we have created.
- Enter the given URL (without
/admin)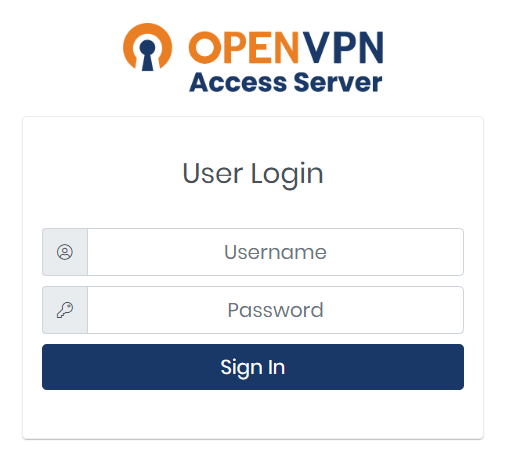
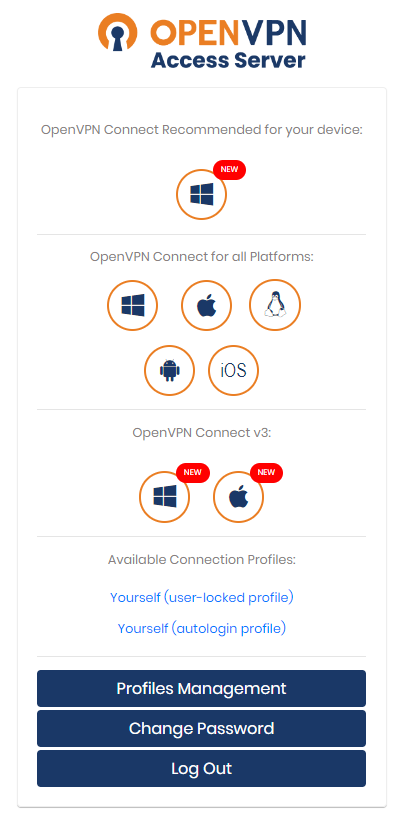
- Enter the
UsernameandPasswordof the users that we have created. - And this is the dashboard display from the user, please download the application according to the operating system you are using, you can also download the application on the Play Store and App Store. (I tried it using Android)
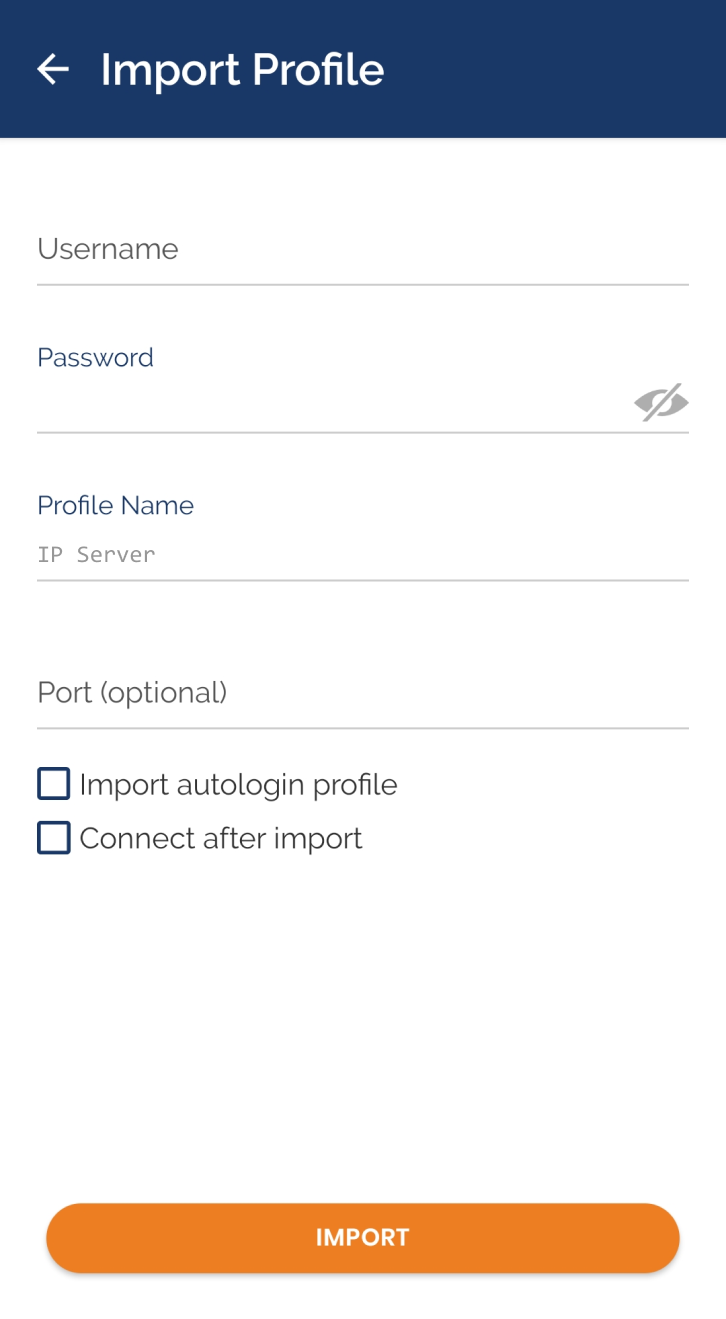
- Next, enter the
UsernameandPassword. The Import autologin profile option can be checked.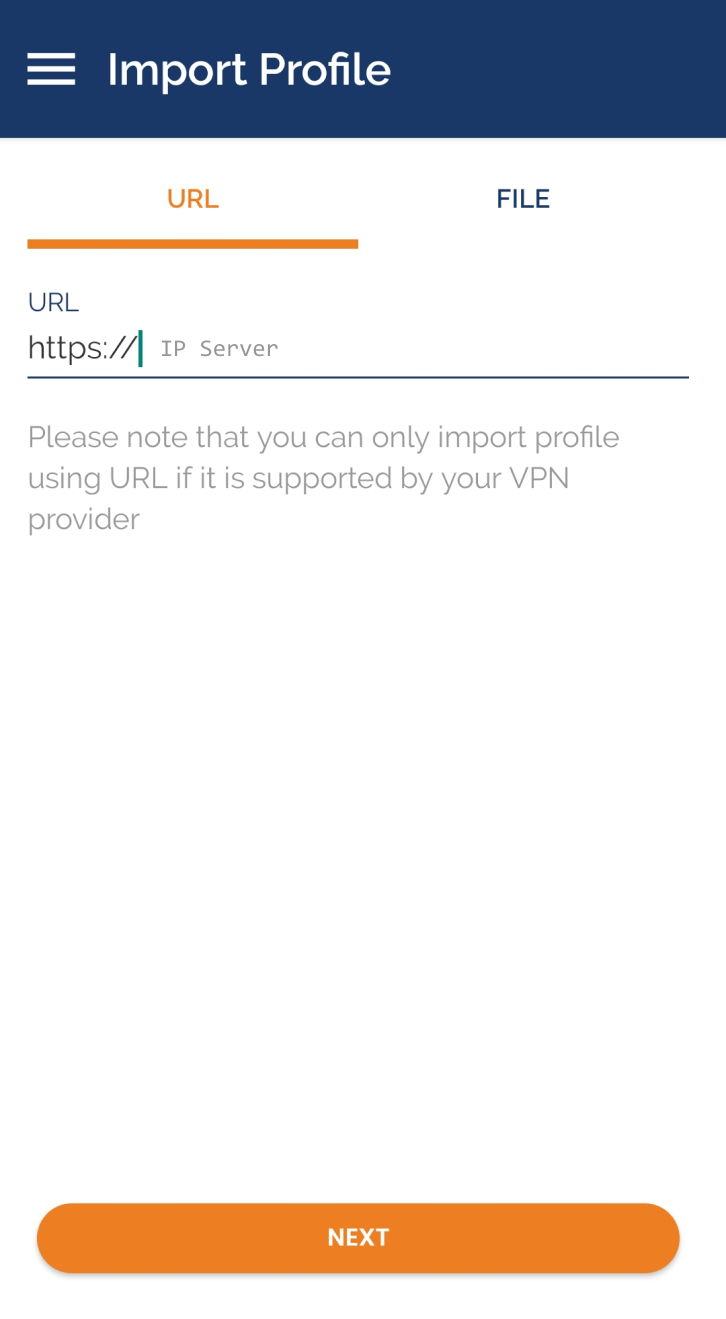
- After a successful download, the initial screen will look like this: (Remember, I tried it on android). Enter your server IP address.
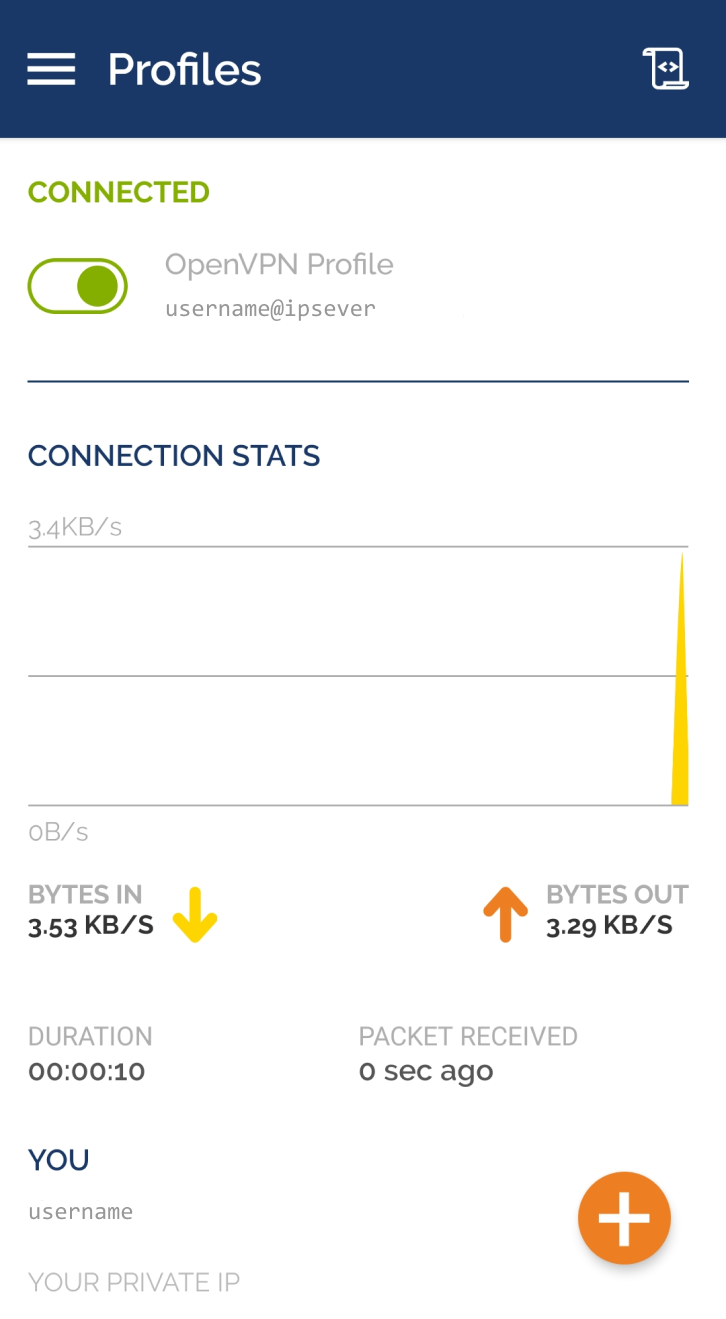
- When successfully connected it will be like this:

- And this is the list of VPNs in your account
Conclusion
Thank you for following this article to the end, I hope the author and readers get useful knowledge in the future.
Reference
And what next?